
The Ultimate Guide to Brewing the Perfect Cup with an AeroPress
Share
If you're a coffee enthusiast searching for a versatile, easy-to-use coffee maker that delivers rich and flavorful brews, the AeroPress is an exceptional choice. Invented by Alan Adler in 2005, the AeroPress has rapidly gained a devoted following among coffee aficionados for its portability, affordability, and ability to brew a wide range of coffee styles. Whether you're new to the AeroPress or looking to refine your technique, this guide will walk you through the essentials of brewing the perfect cup.
### Why Choose the AeroPress?
Before diving into the brewing process, let's explore why the AeroPress stands out among other coffee makers.
1. **Versatility:** The AeroPress can brew coffee that ranges from espresso-like concentrates to light, smooth cups of black coffee. You can also make cold brew or iced coffee with ease.
2. **Portability:** With its compact and lightweight design, the AeroPress is a fantastic option for travelers, campers, or anyone with limited kitchen space.
3. **Ease of Use:** The AeroPress is straightforward to use and clean, making it a great option for both beginners and seasoned coffee lovers.
4. **Customizable:** The AeroPress allows you to experiment with different grind sizes, water temperatures, and brew times to create a cup tailored to your personal taste.
Now that you understand the benefits of the AeroPress, let’s move on to the step-by-step brewing process.
### Step 1: Gather Your Equipment
To brew the perfect AeroPress coffee, you'll need:
- An AeroPress coffee maker (including the plunger, chamber, filter cap, and paper filters)
- Freshly roasted coffee beans
- A coffee grinder
- A kettle (preferably with temperature control)
- A scale (optional, but recommended)
- A stirring utensil (the AeroPress comes with a stirrer, but you can use any spoon)
- A mug or cup
### Step 2: Choose Your Coffee and Grind
The quality of your coffee beans plays a crucial role in the final taste of your brew. Always opt for freshly roasted, high-quality beans to ensure the best results. For the AeroPress, a medium-fine grind is generally recommended, similar to table salt. Grinding your beans just before brewing helps preserve their flavor and aroma.
### Step 3: Prepare the AeroPress
1. **Insert the Filter:** Place a paper filter inside the AeroPress filter cap. Rinse the filter with hot water to remove any papery taste and preheat the AeroPress. This step also helps the filter adhere to the cap better.
2. **Assemble the AeroPress:** Attach the filter cap to the chamber and place the AeroPress on top of your mug or cup.
3. **Measure Your Coffee:** For a standard AeroPress brew, use about 15-18 grams (approximately one to two tablespoons) of coffee, depending on your preferred strength. Adjust this based on taste.
### Step 4: Heat the Water
The ideal water temperature for brewing AeroPress coffee is between 175°F and 205°F (80°C to 96°C). Using a kettle with temperature control makes this easy, but if you don't have one, simply boil the water and let it sit for about 30 seconds to cool slightly.
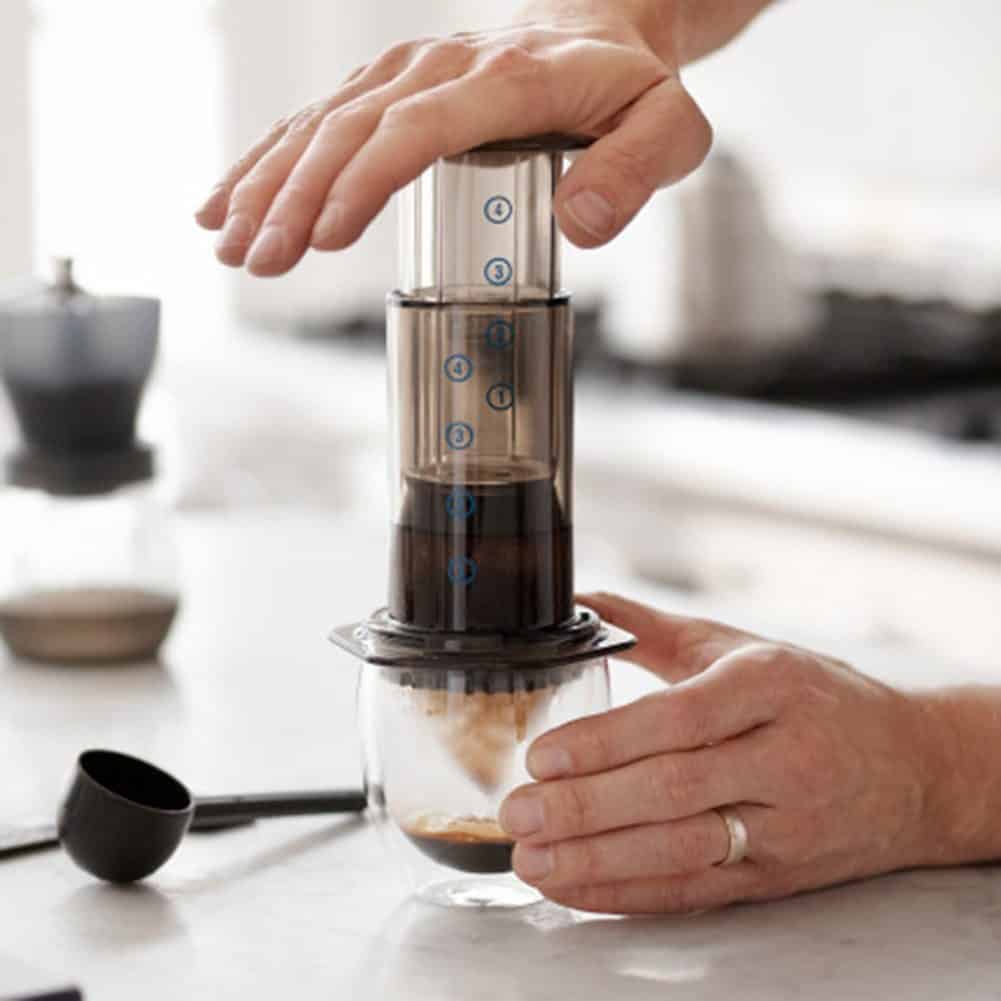
### Step 5: Add Coffee and Water
1. **Add Coffee Grounds:** Place the measured coffee grounds into the AeroPress chamber.
2. **Pour Water:** Start your timer and pour in hot water until it reaches the desired level. For a standard brew, fill to the "1" or "2" mark on the chamber. The AeroPress has markings that make it easy to measure, but you can also use a scale to ensure accuracy.
3. **Stir:** Give the coffee and water a quick stir (about 10 seconds) to ensure all the grounds are evenly saturated.
### Step 6: Brewing Methods: Traditional vs. Inverted
There are two popular methods for brewing with the AeroPress: the traditional method and the inverted method. Both have their own merits, and your choice will depend on your flavor preferences.
#### Traditional Method
1. **Plunge:** After stirring, immediately attach the plunger and gently press down with steady pressure. The entire plunging process should take about 20-30 seconds. Stop pressing when you hear a hissing sound.
2. **Serve:** Remove the AeroPress from your mug and enjoy your coffee.
#### Inverted Method
The inverted method is popular among those who prefer a longer brew time for a stronger, richer cup.
1. **Assemble:** Start by placing the plunger into the chamber and flipping the AeroPress upside down so the filter cap is at the top.
2. **Add Coffee and Water:** Follow the same steps as the traditional method for adding coffee and water.
3. **Stir and Steep:** After stirring, let the coffee steep for 1-2 minutes.
4. **Attach the Filter Cap:** Carefully attach the filter cap, making sure the filter is in place.
5. **Flip and Plunge:** Flip the AeroPress over onto your mug and press the plunger down slowly, applying steady pressure.
### Step 7: Clean Up
One of the best aspects of the AeroPress is how easy it is to clean. After brewing, remove the filter cap and press the plunger to eject the coffee puck and used filter into the trash or compost. Rinse the AeroPress components with water, and you’re done!
### Step 8: Experiment and Enjoy
The AeroPress is all about experimentation. Feel free to play with different grind sizes, water temperatures, and brew times until you find your perfect cup. You can also try adding milk, cream, or sweeteners to your coffee, or using the AeroPress to make concentrated coffee for lattes and cappuccinos.
### Conclusion
The AeroPress is a fantastic tool for anyone looking to brew high-quality coffee with minimal effort. Whether you're a novice or a seasoned coffee drinker, mastering the AeroPress will open up a world of possibilities for enjoying your favorite beverage. With its combination of simplicity, versatility, and portability, the AeroPress is a must-have for coffee lovers everywhere.
Happy brewing!
**#AeroPressMagic #CoffeeLovers #BrewBetter #HomeBrewing #CoffeeTime**